
Large displays give you more room. When code, terminals, documents, and reference material all need to stay visible, more tiling options help you put that space to use.
KeyTiler is a macOS window manager with a visual Layout Panel for Halves, Quarters, Thirds, Sixths, and Four Strips. Remember ⌃+⌥+X to open the panel, then choose a layout and zone with the mouse. You can arrange windows without memorizing a shortcut for every position. With multiple displays connected, you can also move the active window directly to another screen.
Keep more of your work visible on large displays
If you use a large, high-resolution display, several large monitors, or a workflow that needs many app windows in view, arrange them around the content you need:
- Development and debugging: Keep your editor, terminal, browser, and documentation visible so you can see results as you change code.
- Research and writing: Place your draft, sources, and notes side by side for comparison and reference.
- Data analysis: Show spreadsheets, charts, and supporting documents together to keep context in view while comparing data.
Use Halves for two windows side by side. When you need more windows visible, choose from Quarters, Thirds, Sixths, or Four Strips. Pick a suitable zone for each active window to build your workspace one window at a time.
Before you start
- Use macOS 15 or later. Connect your displays before using multi-display actions; the tiling layouts also work on a single large screen.
- Download and install the current KeyTiler Preview.
- Allow KeyTiler in System Settings > Privacy & Security > Accessibility. This permission lets it move and resize other apps’ windows.
Preview releases have an expiration date. See the FAQ for details.
Choose your tiling layout from one panel
- Activate the window you want to arrange. Click that window before opening Layout Panel; KeyTiler applies your choice to the active window.
- Open Layout Panel with ⌃+⌥+X. This is the default shortcut. The panel initially selects a layout based on your usage history.
- Choose a tiling layout with the mouse. Pick Halves, Quarters, Thirds, Sixths, or Four Strips to suit the content you are arranging.
- Choose a zone for the window. If multiple displays are connected, confirm the target display in the panel before selecting a zone.
- Repeat for another window. Activate it and make another panel choice. Each action applies to one window; it does not automatically tile all open windows.
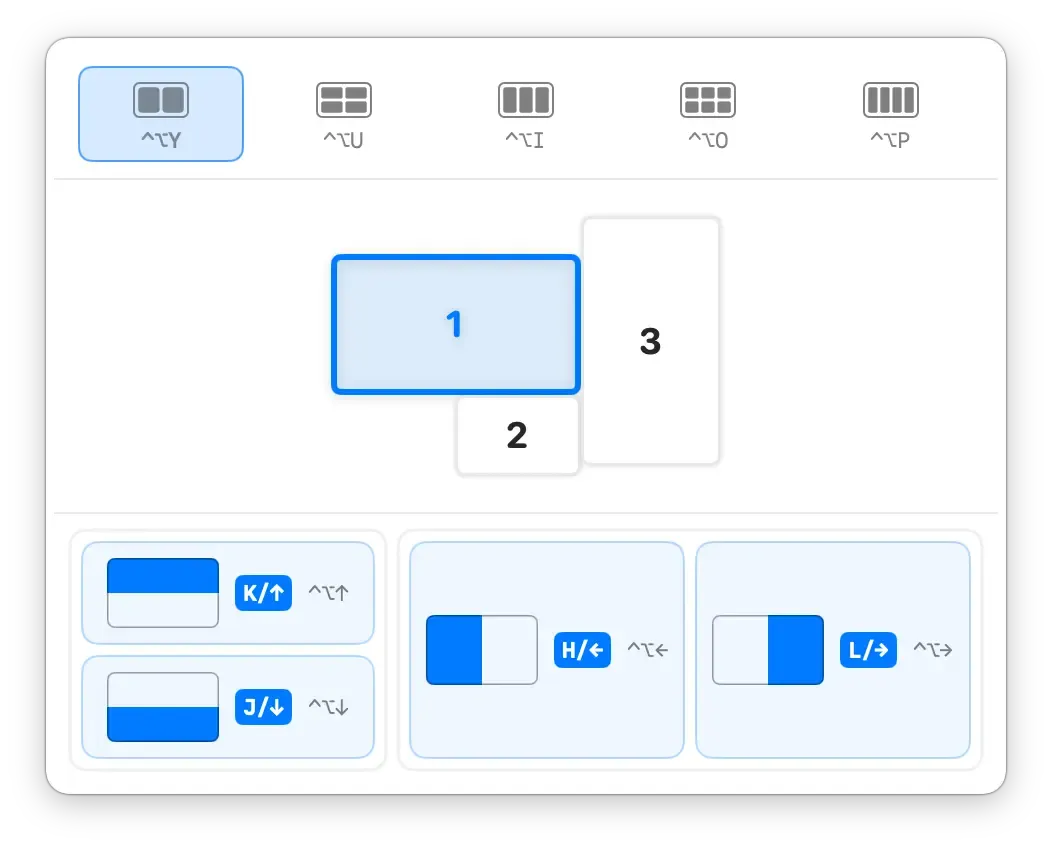
Halves works well for two windows side by side. Switch layouts in the same panel when you need smaller zones.
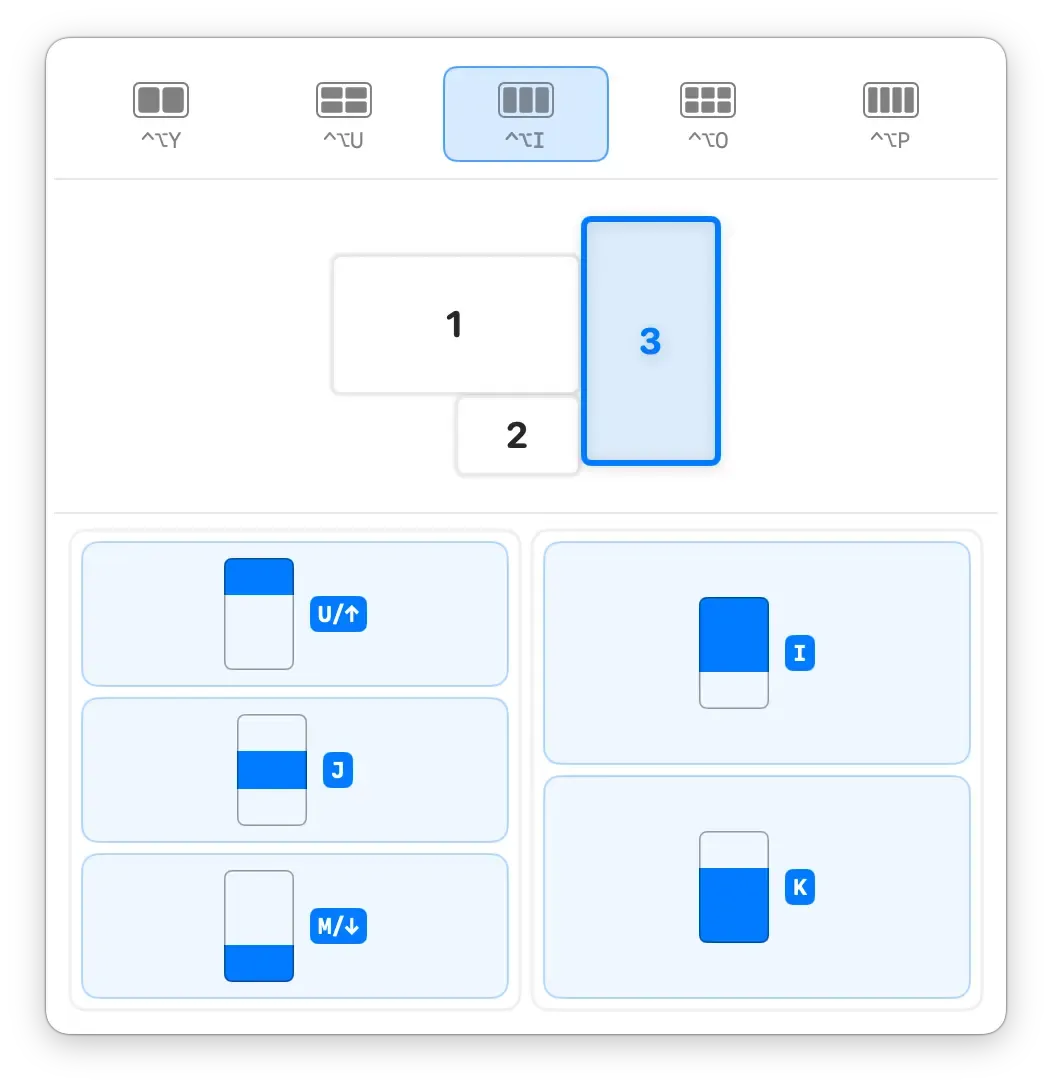
Thirds also has choices for portrait displays. Choose zones that suit the screen orientation and content to keep reference material visible alongside your main work.
Add shortcuts for the layouts you use most
You can choose layouts entirely through the panel. If you use a particular layout often, learn just its default shortcut to open it directly:
- ⌃+⌥+Y: Halves
- ⌃+⌥+U: Quarters
- ⌃+⌥+I: Thirds
- ⌃+⌥+O: Sixths
- ⌃+⌥+P: Four Strips
In the panel, use a number key or Space to switch the target display when needed. Then use the letter hotkey shown for the window operation to apply it.
Move windows directly between displays, too
Once your windows are arranged, you may want to send the active window to another screen. Use ⌃+⌥+⌘+→ for Next Display or ⌃+⌥+⌘+← for Previous Display. This gives multi-display setups an additional, direct way to move a window.
All shortcuts above are defaults. You can change or disable them in Preferences > Shortcuts. See the complete shortcut reference for other actions, including Maximize and Center Window.
If a window does not move
Check that the intended window was active and that KeyTiler has Accessibility permission. If you just changed that permission, quit and reopen KeyTiler before trying again.
If the issue continues, send a compatibility report describing what you expected, what happened, and your KeyTiler and macOS versions. The form does not accept screenshots or logs.
Start with the windows you use most. Choose a tiling zone for each, then arrange the rest as you need them.